Hand-tailored buttonholes are a thing of beauty, and in the hands of a skilled tailor, can make a coat stand out amongst others. Properly sewn, they will add a level of detail that you can be proud of, yet at the same time will sit unassumingly against the background of the coat. On the other hand, a badly-done buttonhole will absolutely ruin the look of a coat, so practice on scraps of fabric is a must.
Most people will at first find buttonholes very difficult to make. With practice, however, you will gain proficiency and it will become almost second nature. The best way to learn is by having somebody teach you. However, finding a skilled tailor willing to teach you is not always the easiest thing to do. I have created several videos and documented each step in order to try to take the place of a personal tutor. At the very least, you will not have to go searching through old books to pick up hints here and there.
Layout
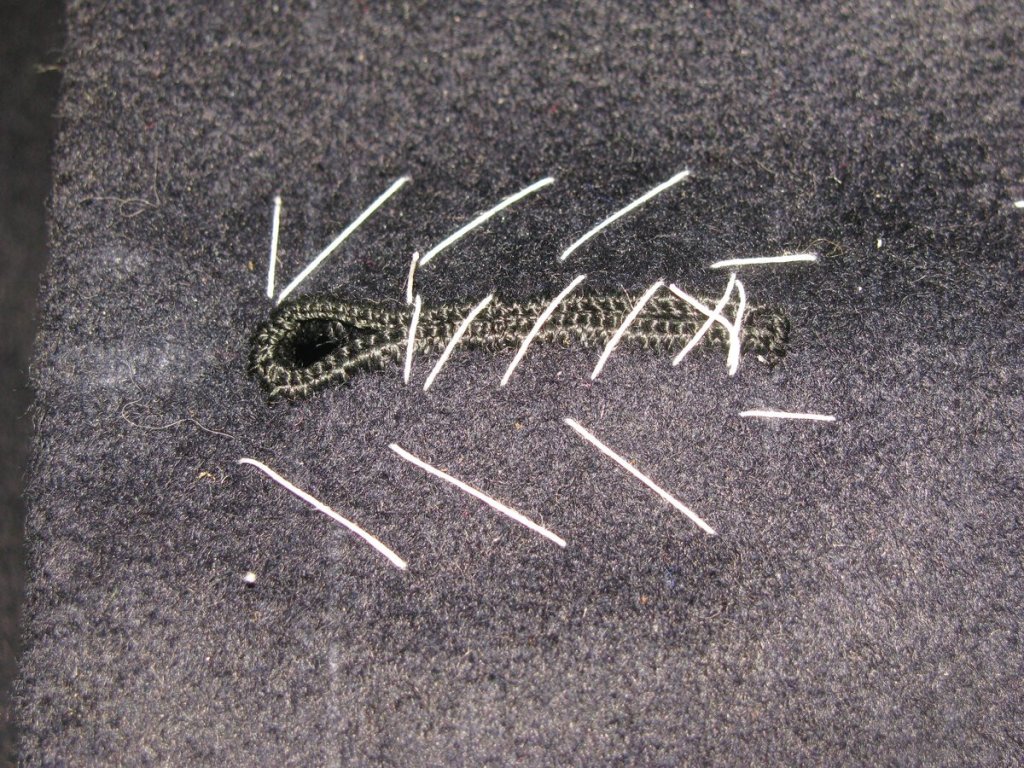
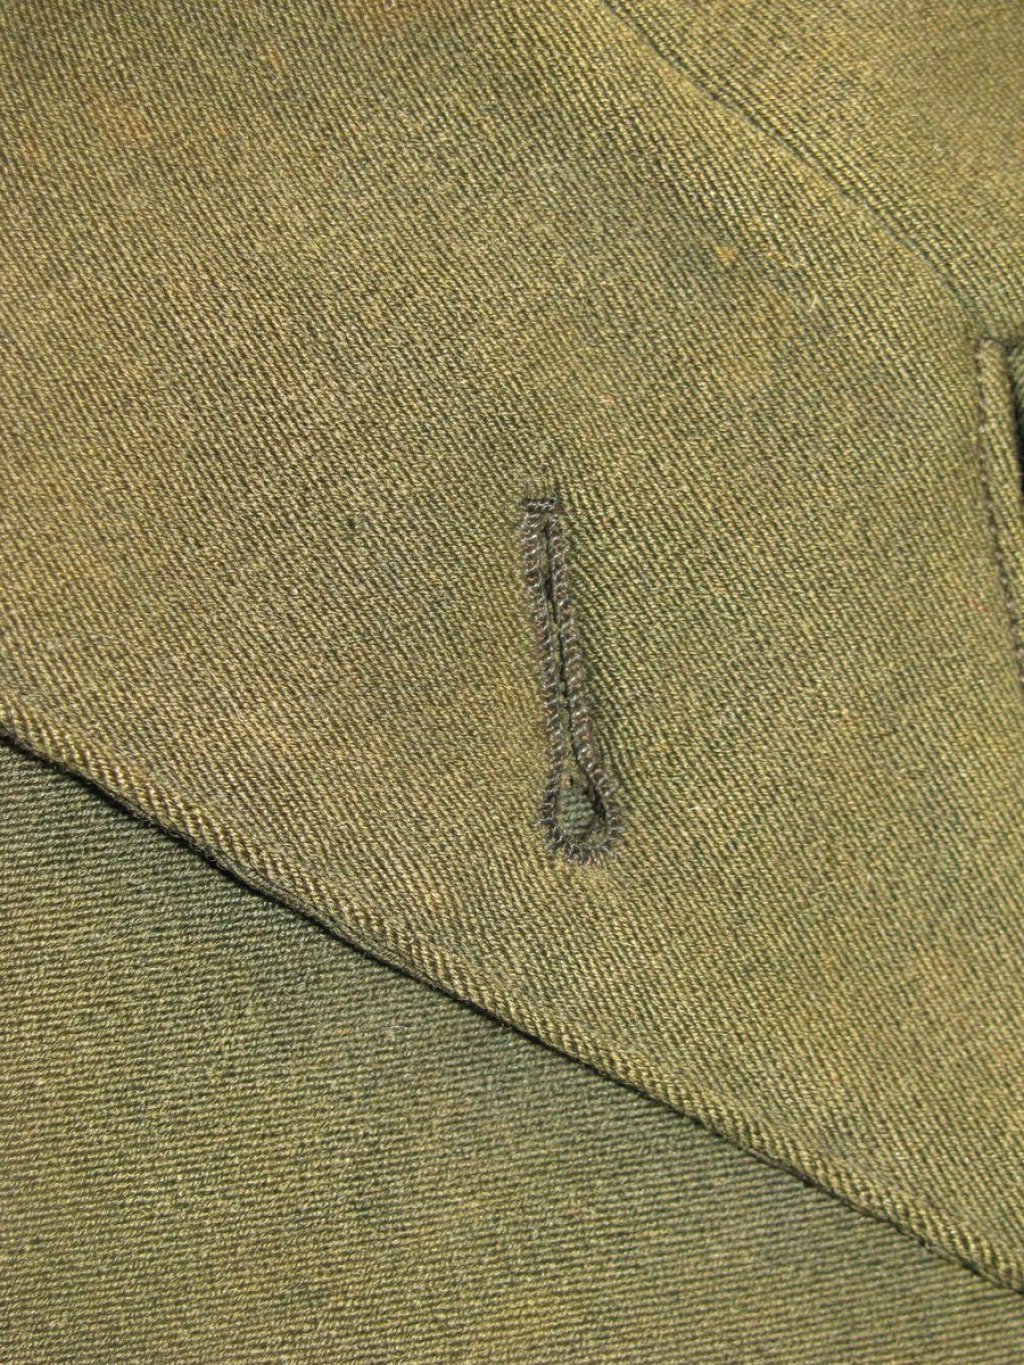
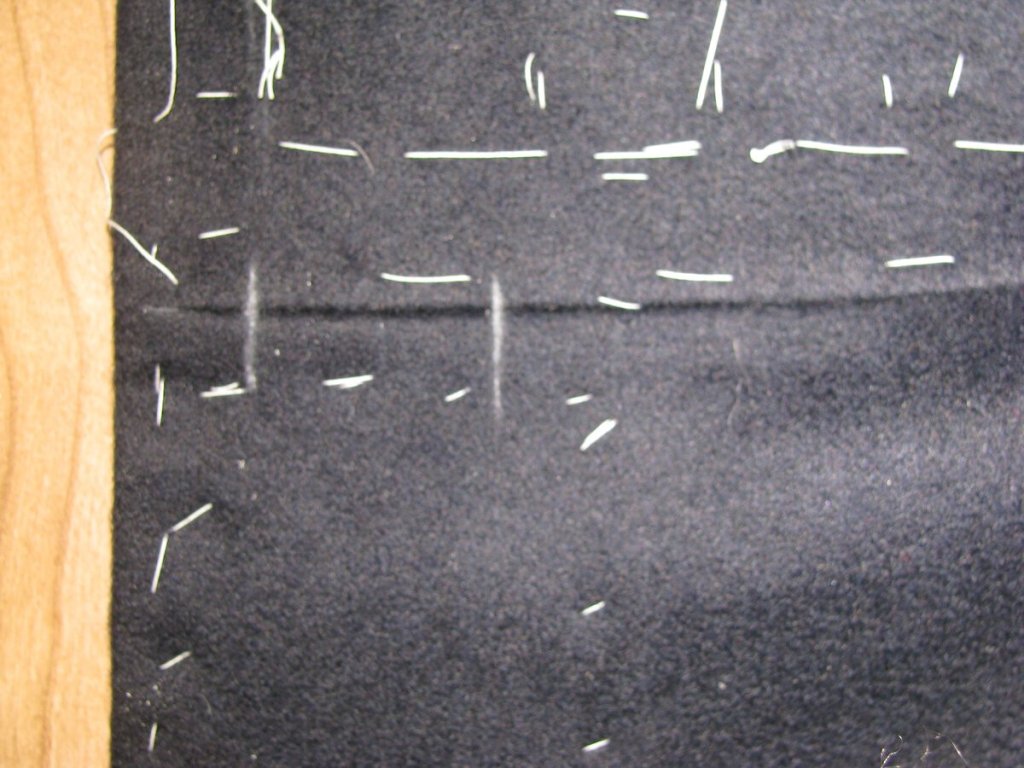
To begin with, the buttonholes must be marked out on the jacket. The bottom buttonhole location should be marked first, and in the case of a frock coat, should be in the waist seam. The top buttonhole should then be marked, according to your desired style. In my case, an enlisted frock coat, the top buttonhole will be placed ½” from the neck point.
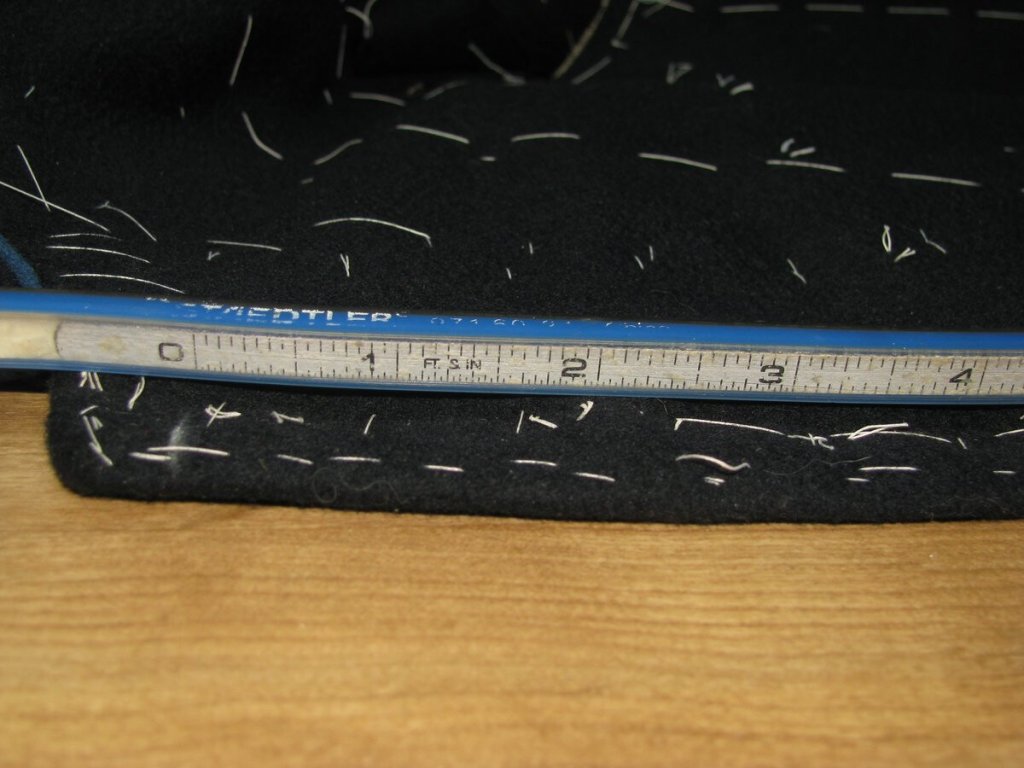
Using a tape measure or bendable ruler, measure the distance from the top buttonhole to the bottom, running a half inch away from the front edge of the coat. Determine the number of buttonholes you want, and subtract one from that number, equivalent to the number of spaces between buttonholes. In my case, there are nine buttonholes, and eight spaces.
Starting at the top, place your tailor’s square with the divisional side up, so that the top buttonhole to bottom buttonhole measurement corresponds with the number of spaces between. In my example, the top to bottom measurement was 16 inches, and I want it divided into 8 spaces between. This happens to be the nice round number of 2, but with other measurements, it can easily be more complicated, hence using the tailor’s square.
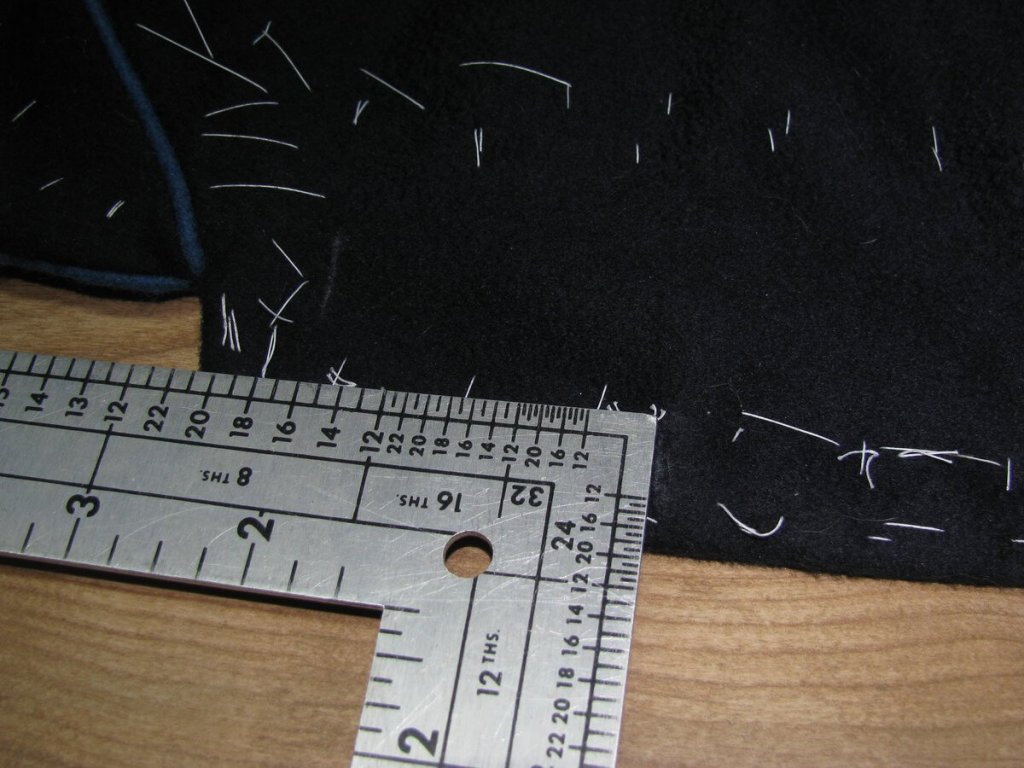
Mark off on the edge of the coat each buttonhole mark according to the ruler. Be sure to take the width of the chalk marks into account. If you forget, go back and adjust, as I had to do in this case. You will discover this problem when you get to the second from bottom buttonhole, and discover there is a smaller space between them.
Next, draw lines square from the edge of the cloth corresponding with each buttonhole mark. These need to be at right angles with the cloth, and not parallel with each other, as the front of the coat has a bit of a curve to it.
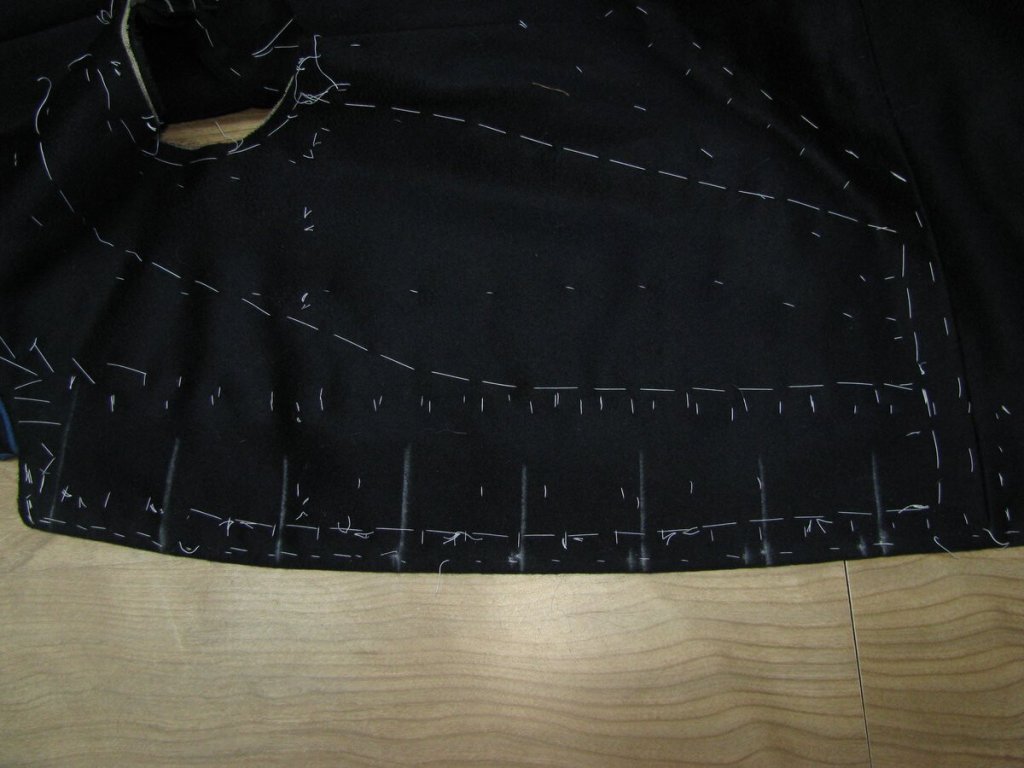
Mark ½ inch from the edge at each buttonhole, marking the outer edge of the buttonhole. For the inner edge of each buttonhole, mark a line 1/8 inch larger than the width of the button.
On the waist seam buttonhole, you obviously don’t need to mark the placement horizontally, just the end points.
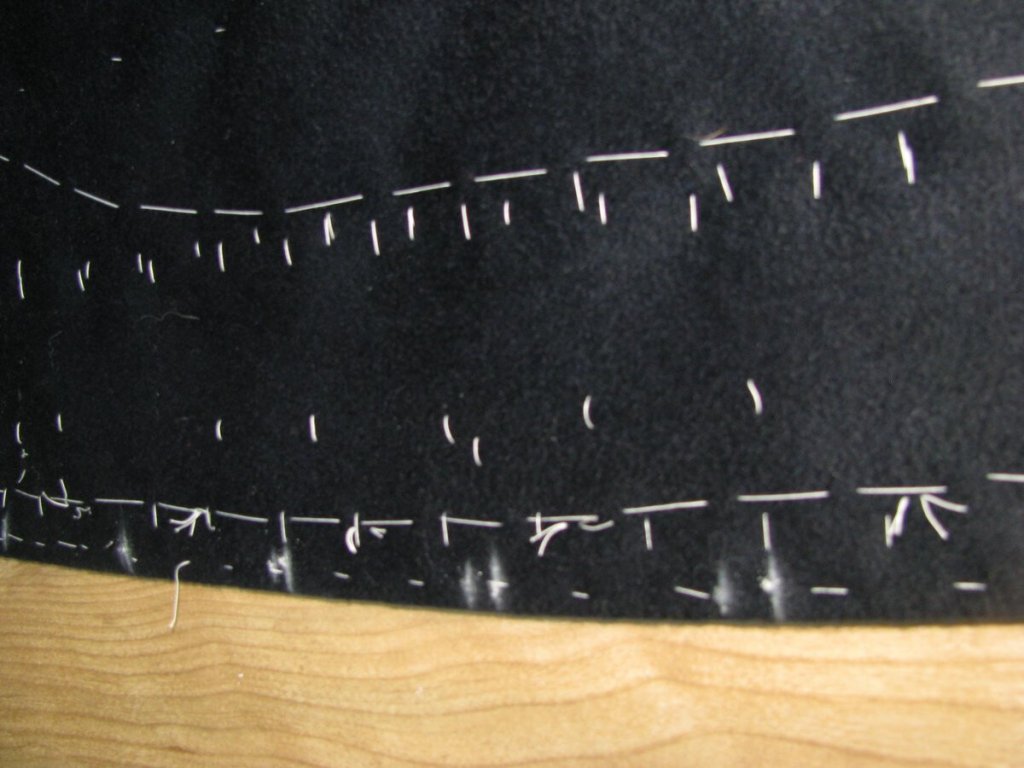
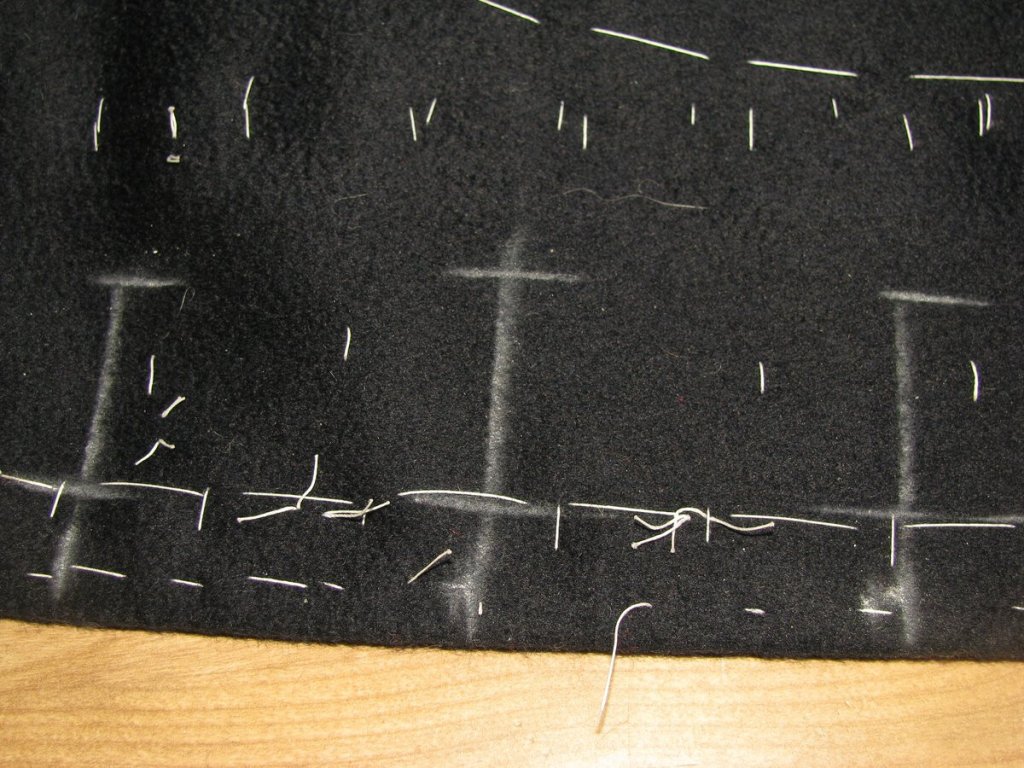
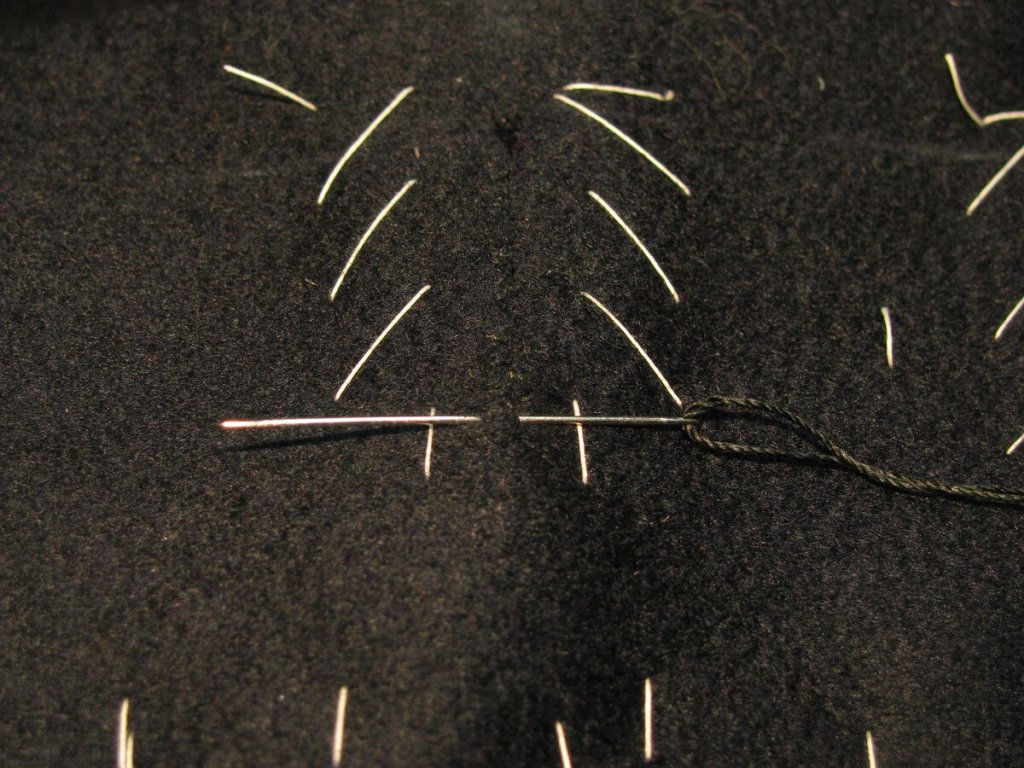
Basting
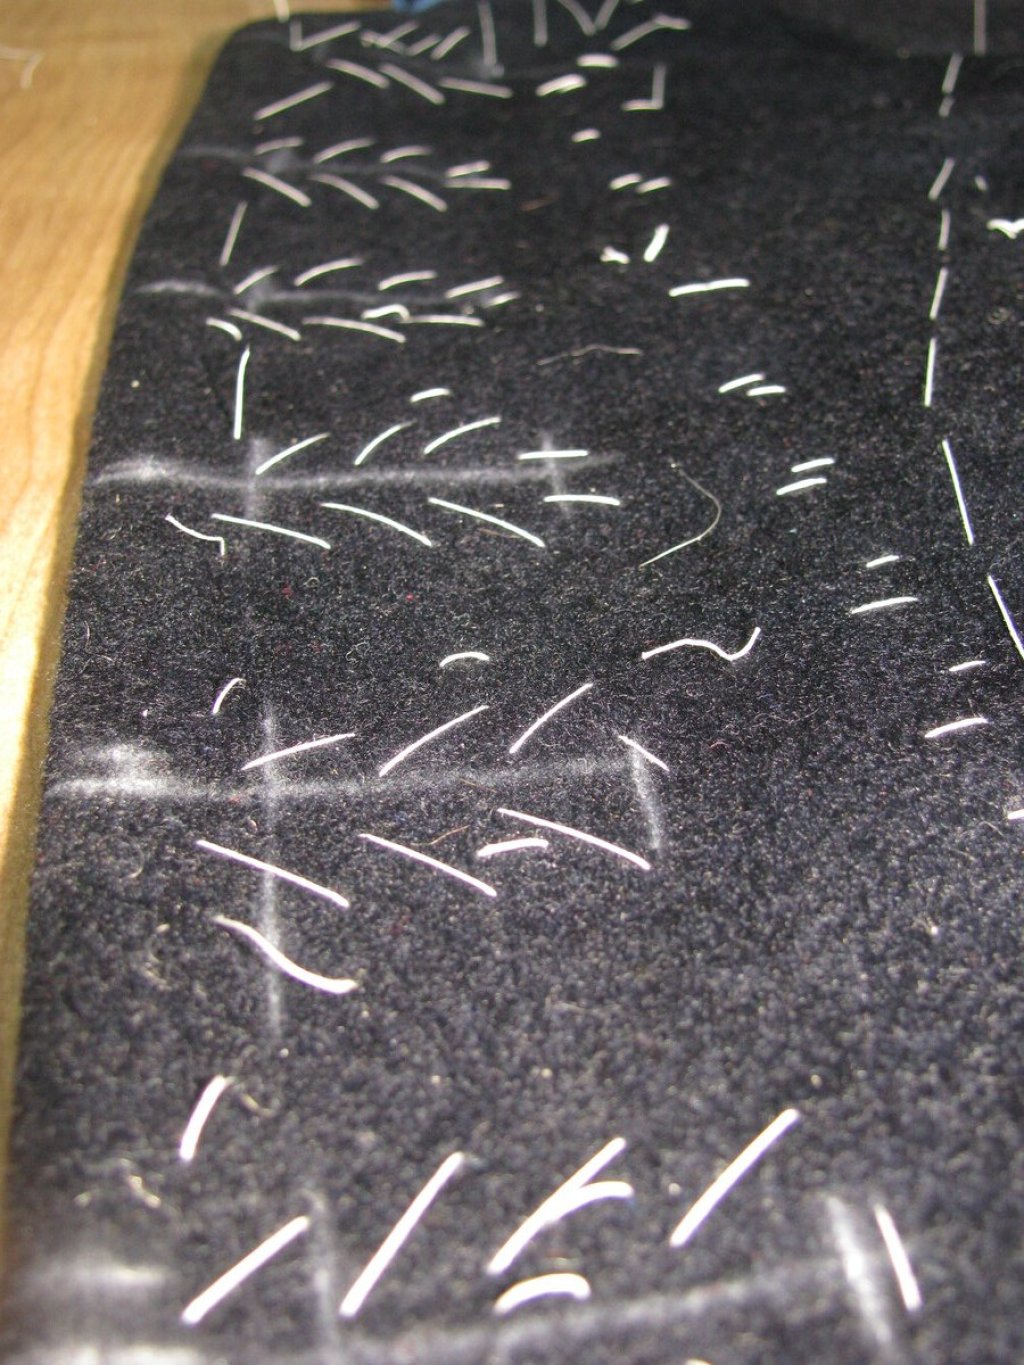
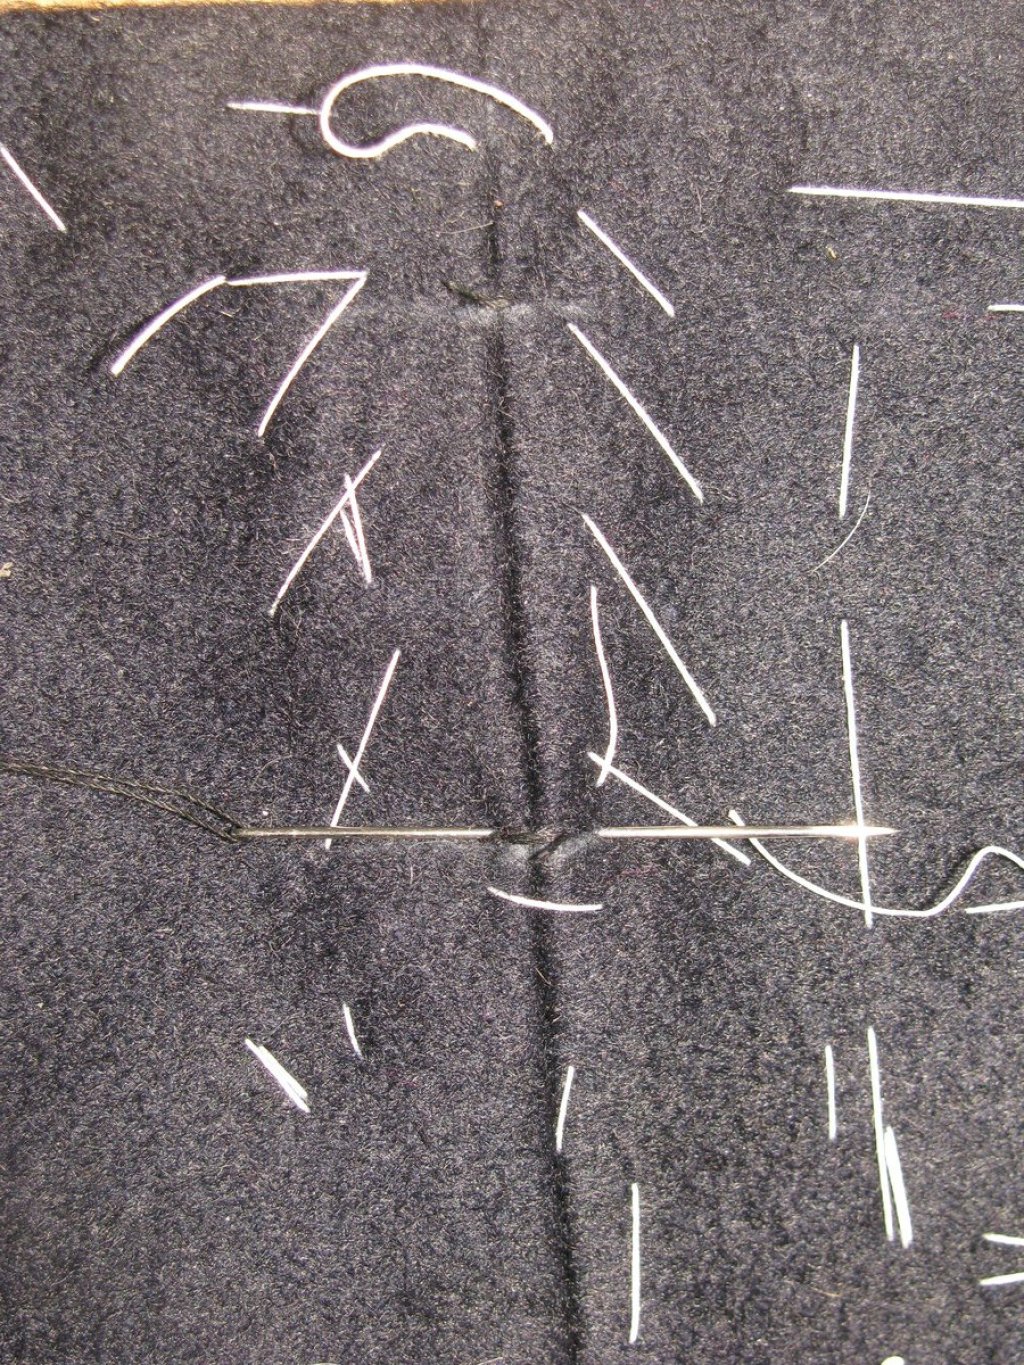
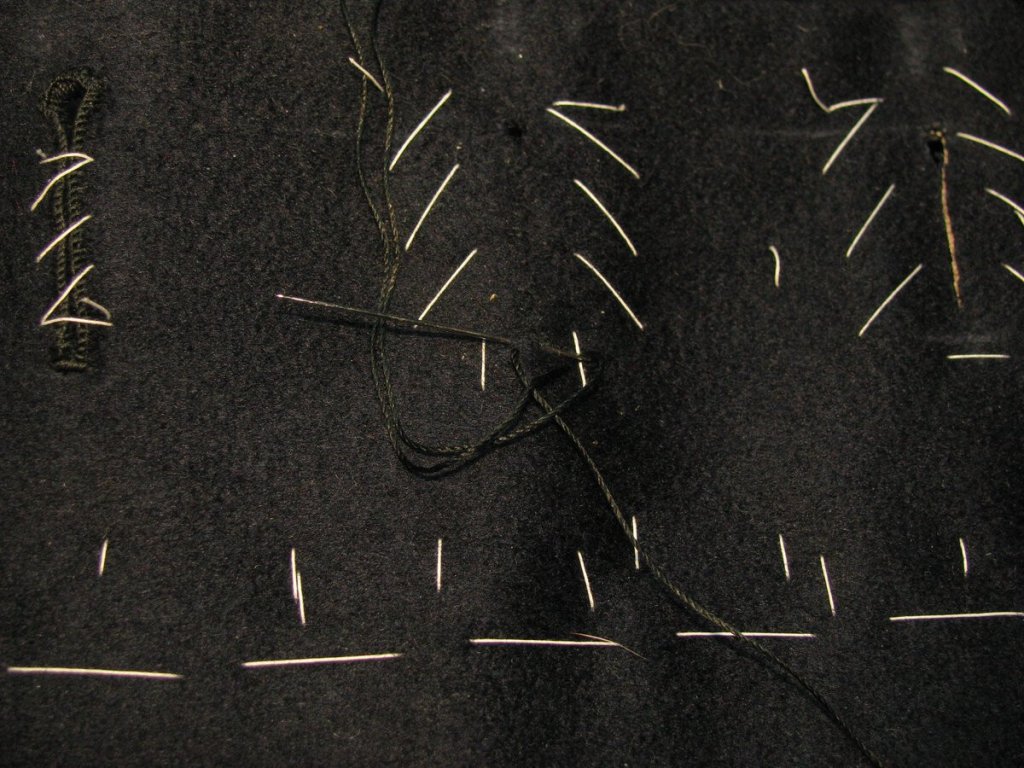
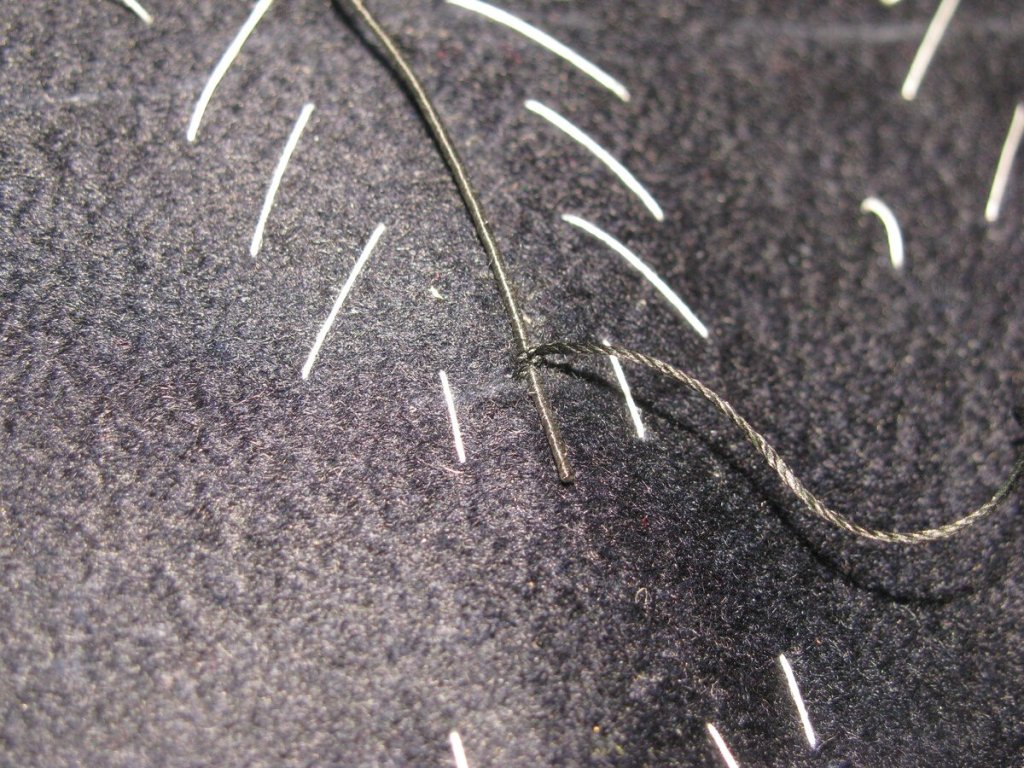
While there may be basting stitches still holding the canvas and facing in place, you need to ensure that there is absolutely no movement when cutting the holes. Using basting thread, baste around each buttonhole as shown, using a padding type stitch. The needle is inserted right to left, and you stitch in this same direction both towards and away from you.
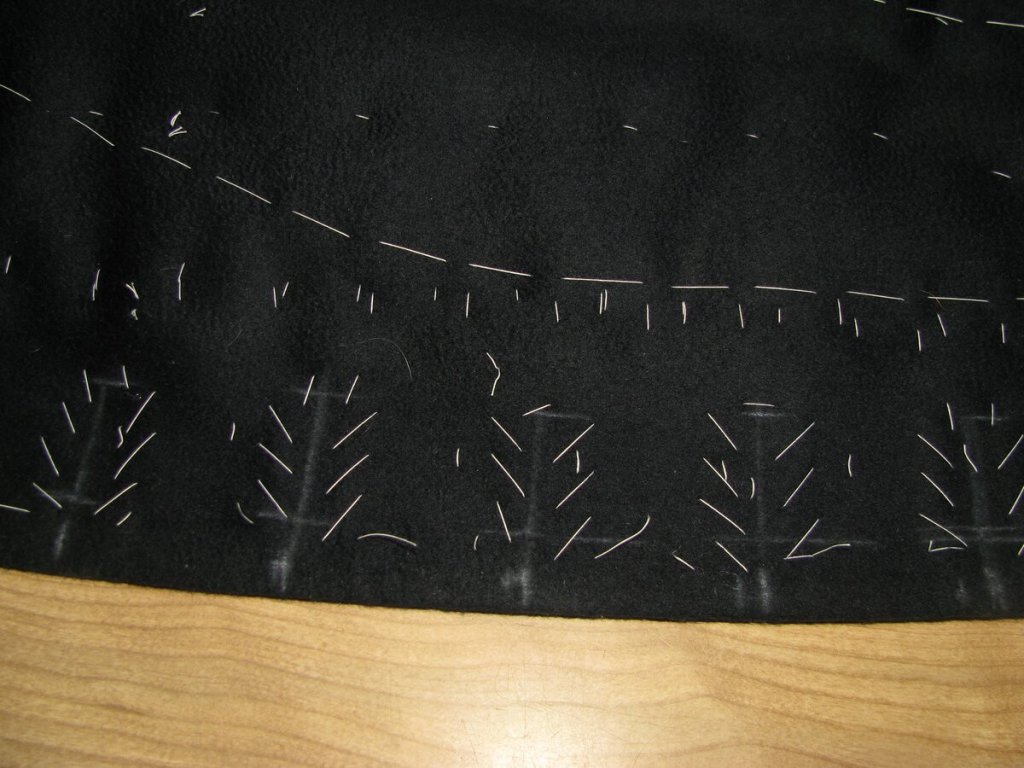
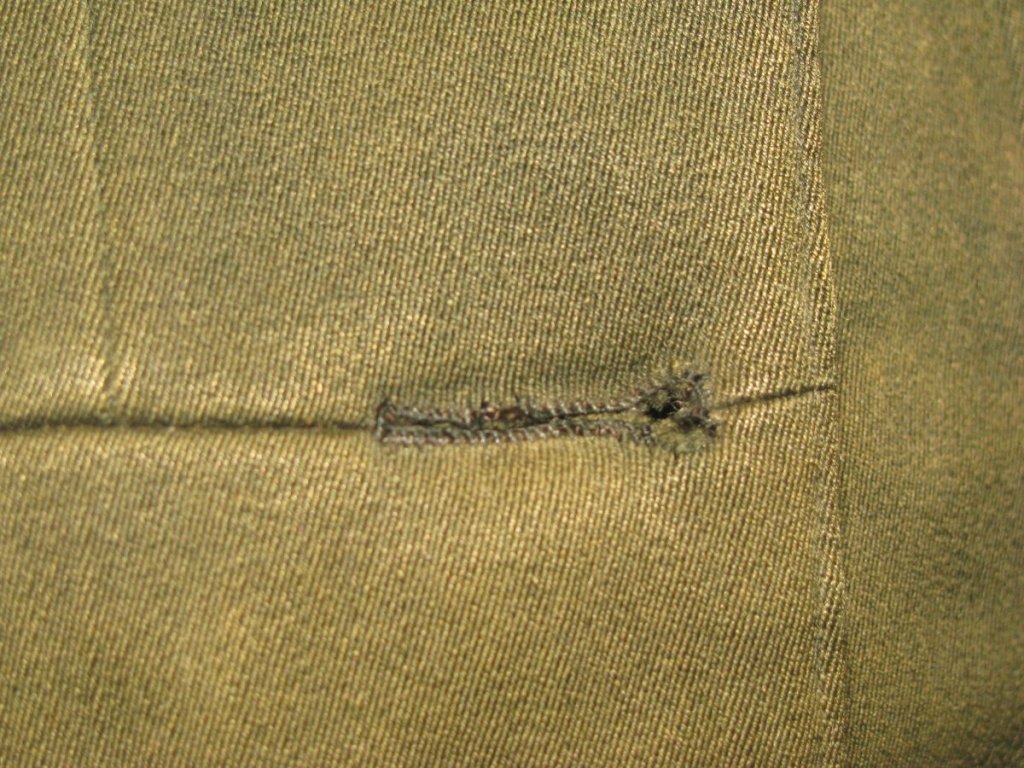
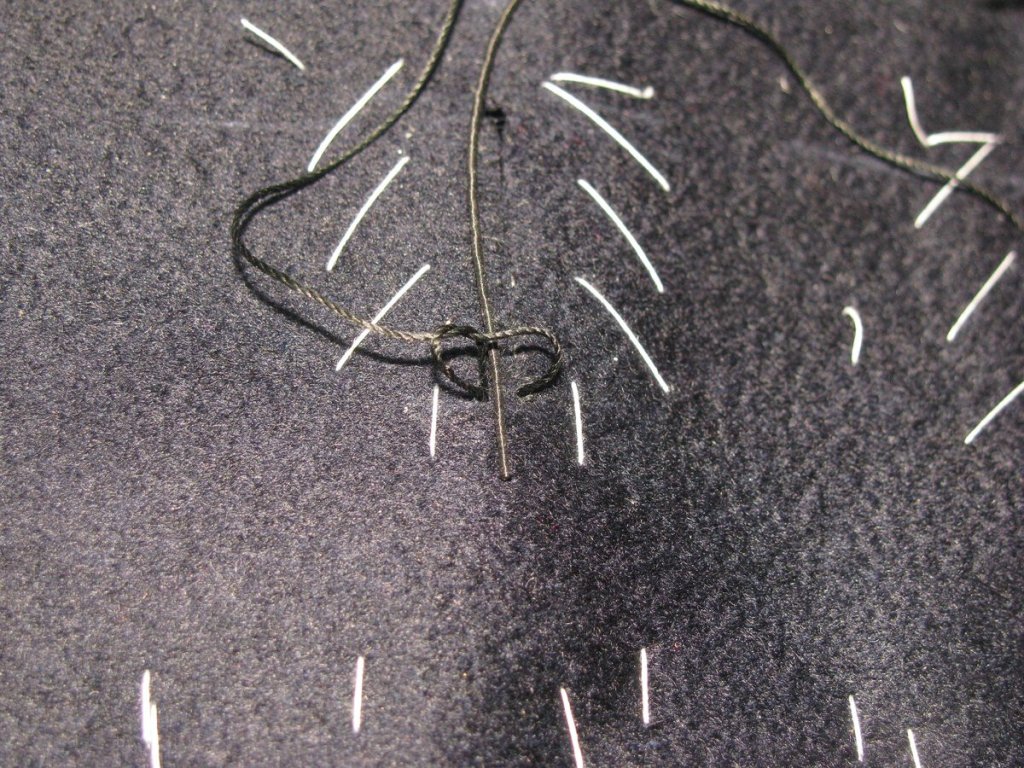
On the waist seam buttonhole, you’ll want to make sure the seam does not come apart when you cut into it. On both ends of the buttonhole, just beyond the chalk marks, make a small bartack by taking five or so stitches in places, catching both the forepart and skirt.
Cutting Open the Buttonholes
There are several tools used in cutting a tear-dropped shaped buttonhole. First, you need a sturdy surface, such as a work bench, in order to have a place to hammer. On top of that, place a scrap of lumber, preferably beech as it lacks oils and resin that could stain the cloth.
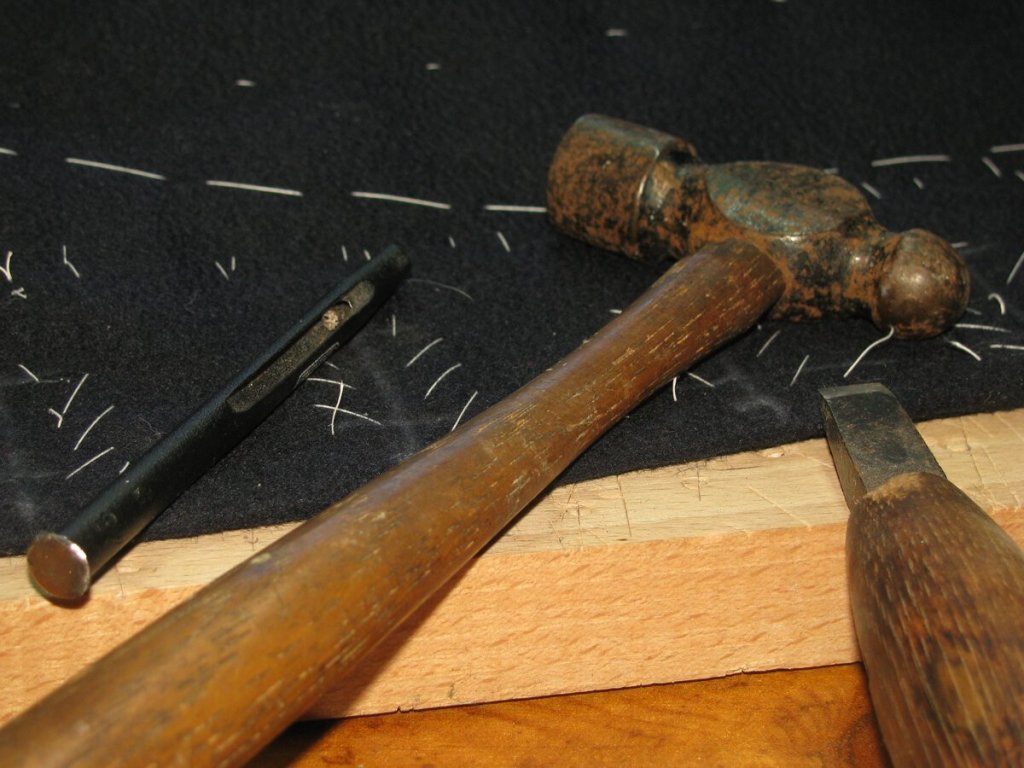
To cut the buttonholes, I use a hollow punch to cut the eyelet area. These are available at most hardware stores for less than five dollars, and are hollow, so as to cut the fabric instead of just pushing it aside, like an awl. I recommend a size 1/8 or 3/16 in diameter.
Ideally, your chisel will be the same size as the desired buttonhole length. If it’s smaller, it will still work, but you’ll need to carefully align each cut, which is prone to error.
Finally, a small hammer is used to hammer the hollow punch and chisel through the cloth. I happen to have a small antique hammer that works well. Much larger and it becomes difficult to control, especially with such a low tolerance for error.
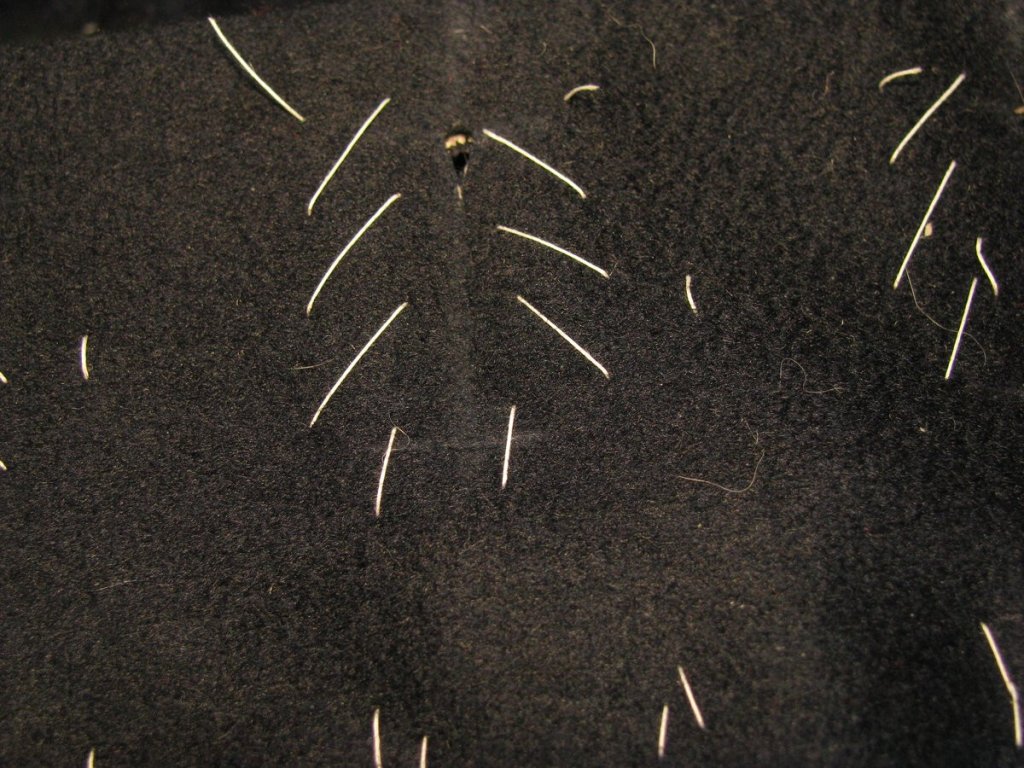
Place the hollow punch directly on the intersection of the horizontal and outer construction lines. Hold it near the bottom if you can, for better leverage and preventing movement. Give it a few strokes with the hammer, cutting through to the wood underneath. You should have a clean cut. If there is any fabric that did not get cut, you need to sharpen your punch. You can also rotate it in the hole to move the dull spot out of the way.
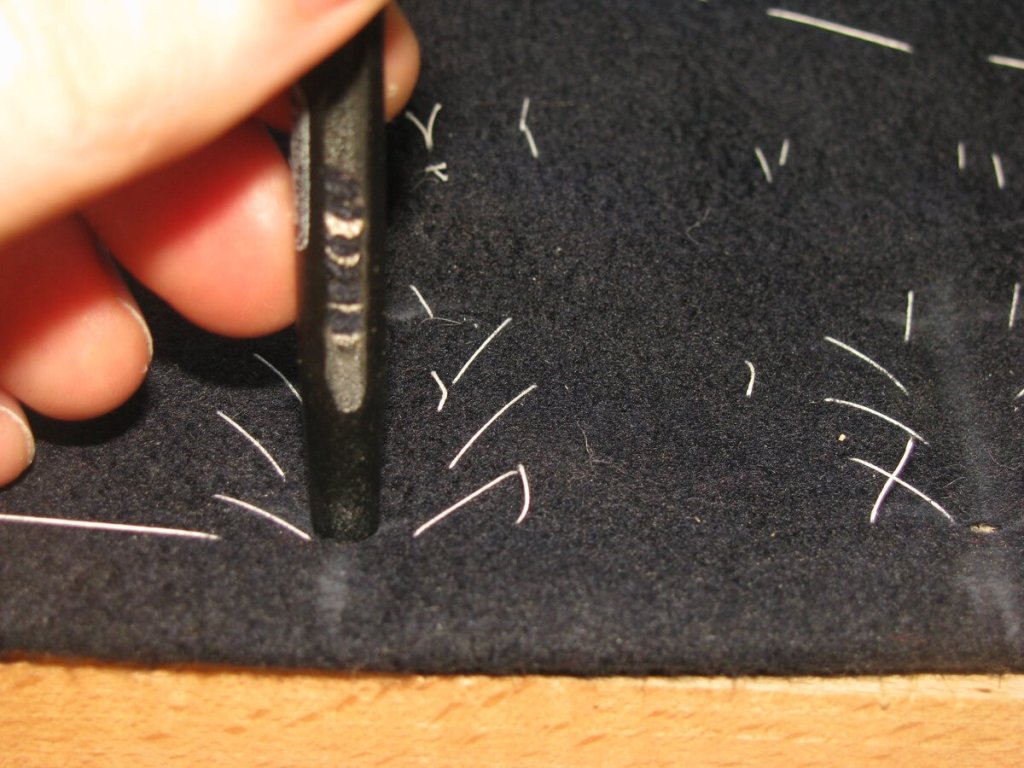
After punching each hole, take your chisel, and line it up with the center of the hole, which should be on the chalkline. I like to do this by feel first, by dragging the tip of the chisel along the hole until you feel it get to the center. Then check with your eyes for alignment. When you are sure it is lined up, cut through the fabric with the chisel. If you need to make more cuts because of a small chisel, do not pick the chisel up. Instead drag it over following the cut you just made. The second cut should be made with just half to three fourths of the blade, while the rest is still over the cut you just made. In this way, you can help ensure the individual cuts line up to make a straight line.
After the buttonhole are cut, you need to trim the little triangular shaped pieces from near the eyelet, giving each hole a nice tear-dropped shape. Use some small, sharp scissors for this task. You may have to trim through one layer at a time, depending on the thickness of the cloth.
Here is a video covering all of the steps thus far.
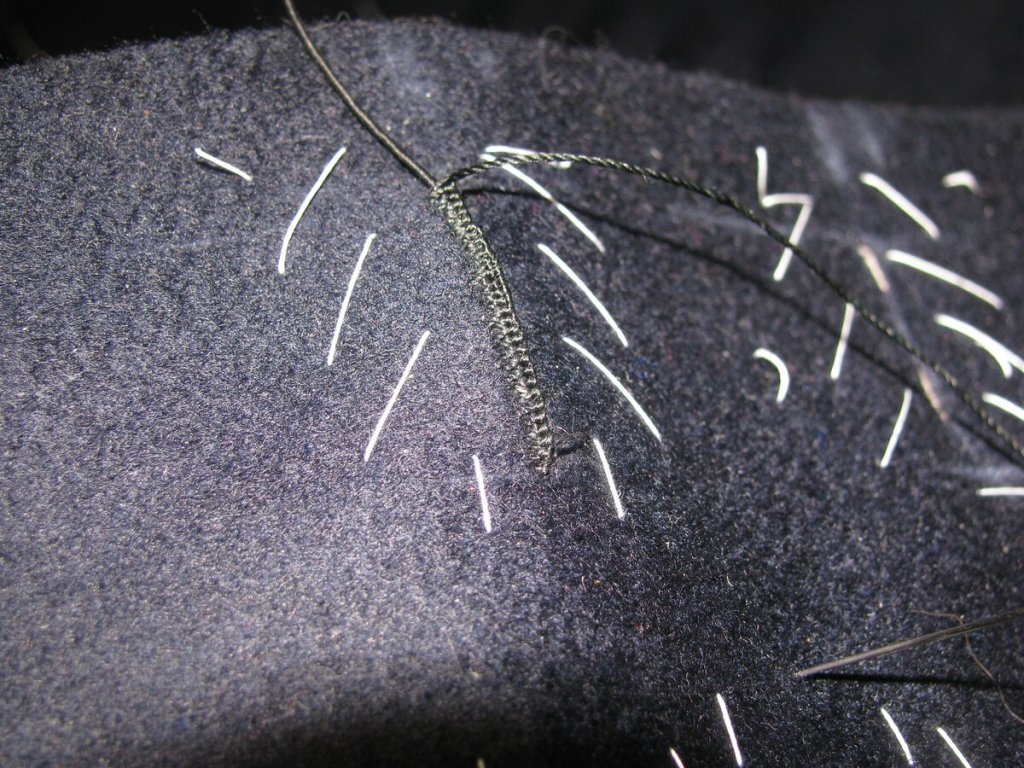
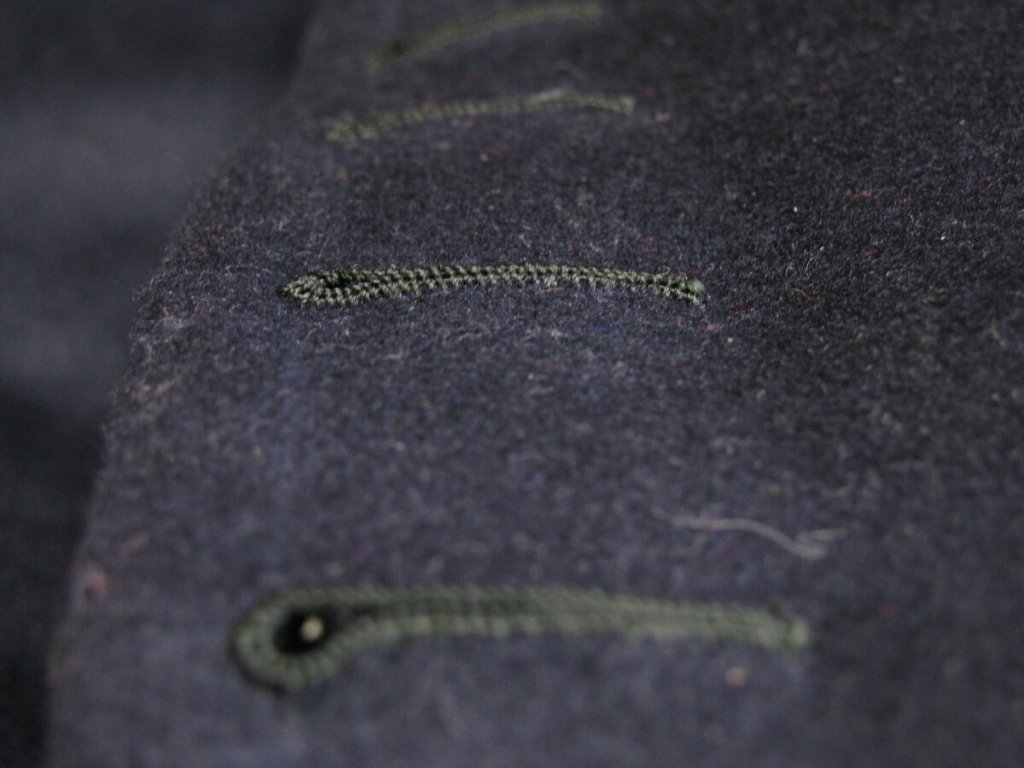
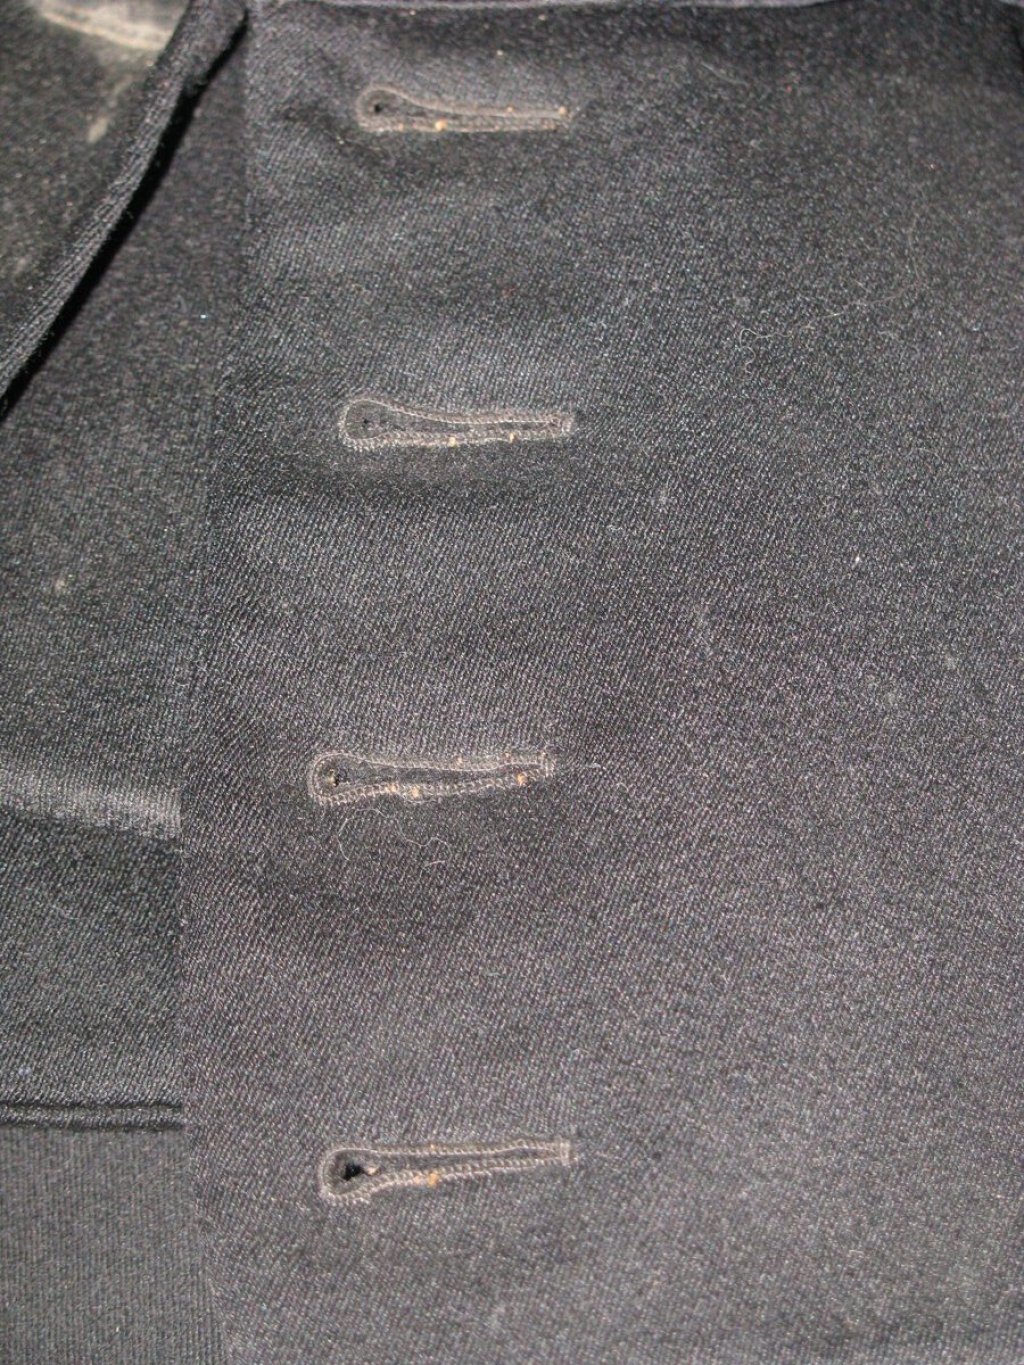
Overcasting
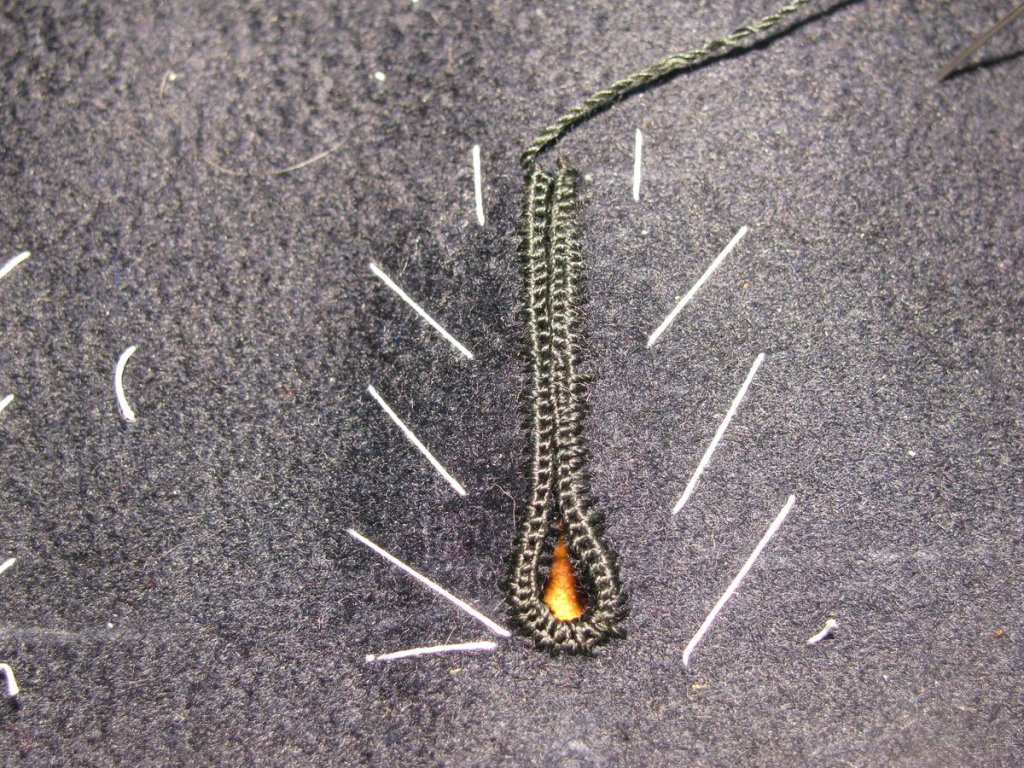
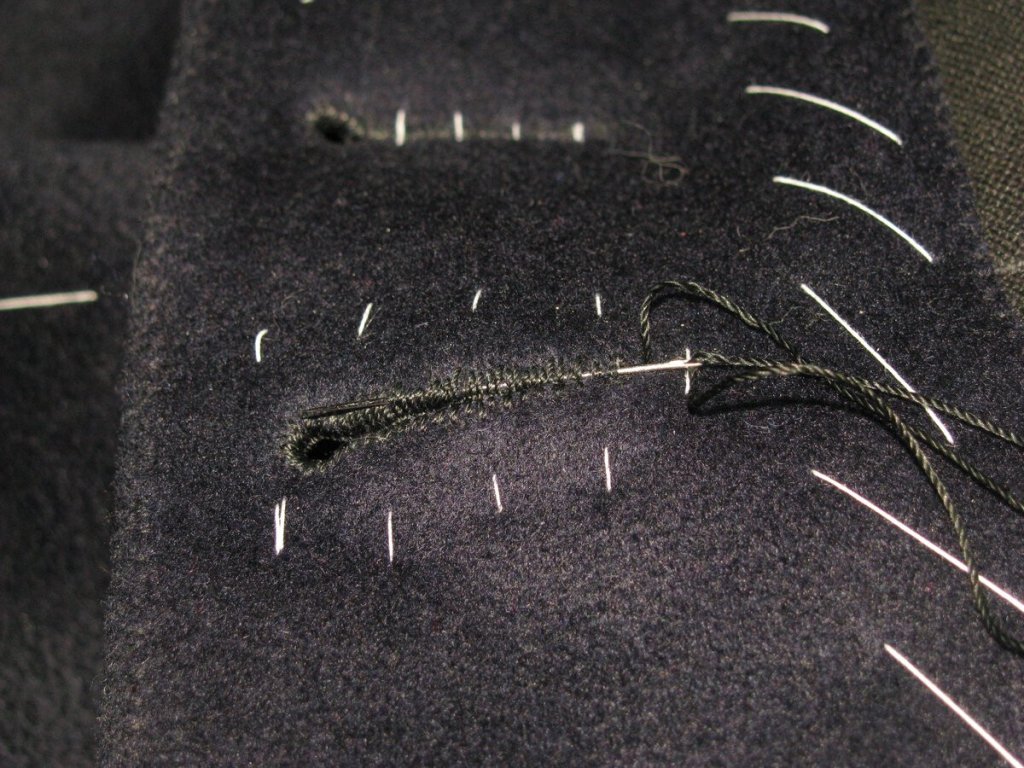
Now you must overcast the edge of each buttonhole with a whip stitch. The stitches should be about 1/16” in depth if you can. This however will depend on whether or not the fabric frays. Start by holding the coat with the tear-dropped end facing away from you, and sew clockwise around the buttonhole. The purpose of these stitches is to bind the layers together. As you are sewing, try to push any canvas or linen that shows back under the wool outer layers,so that they are hidden.
The stitches should be fairly dense, about 12 to 15 per inch. Use your regular sewing thread for this stage. When finished, the stitches should be enough to strengthen the buttonhole and prevent fraying, making the actual button stitch almost decorative in nature. On one of my antique coats, the actual buttonhole twist has long worn away, but the overcast stitches remain, protecting the hole to this day.
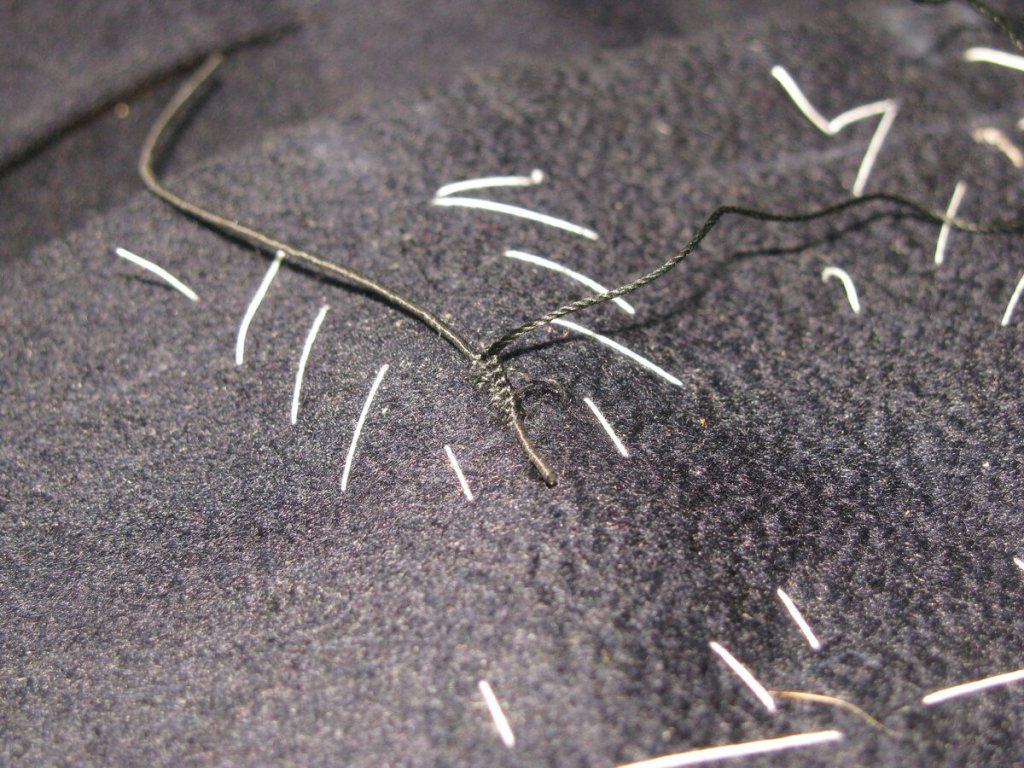
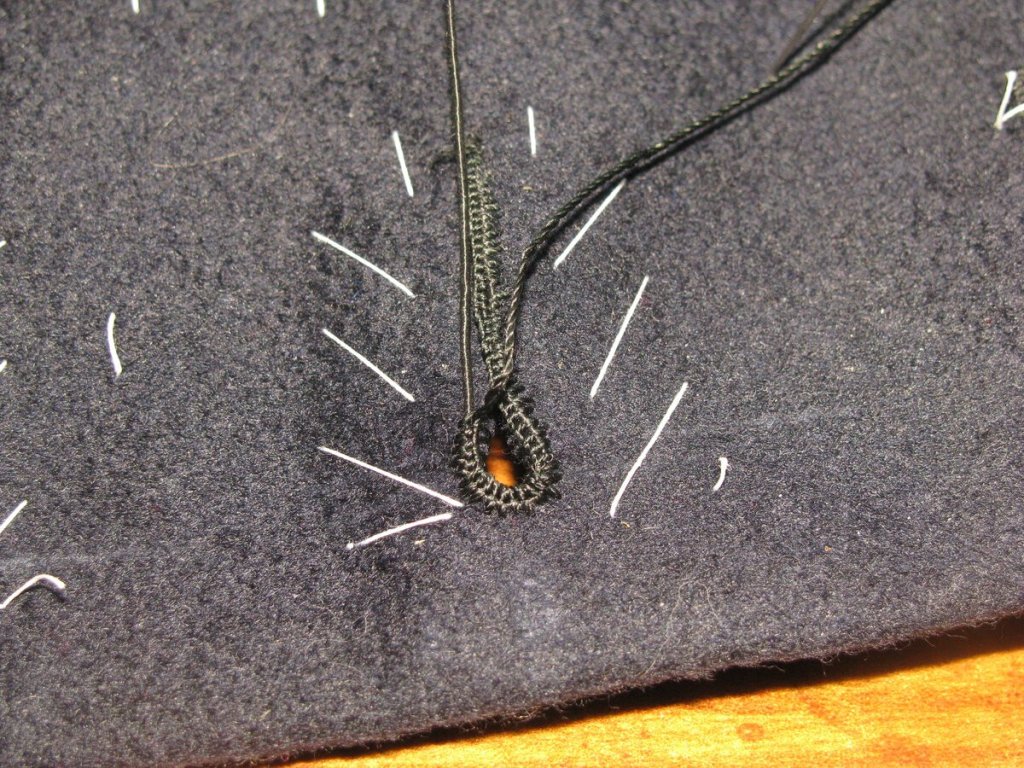
Four Cord or Gimp
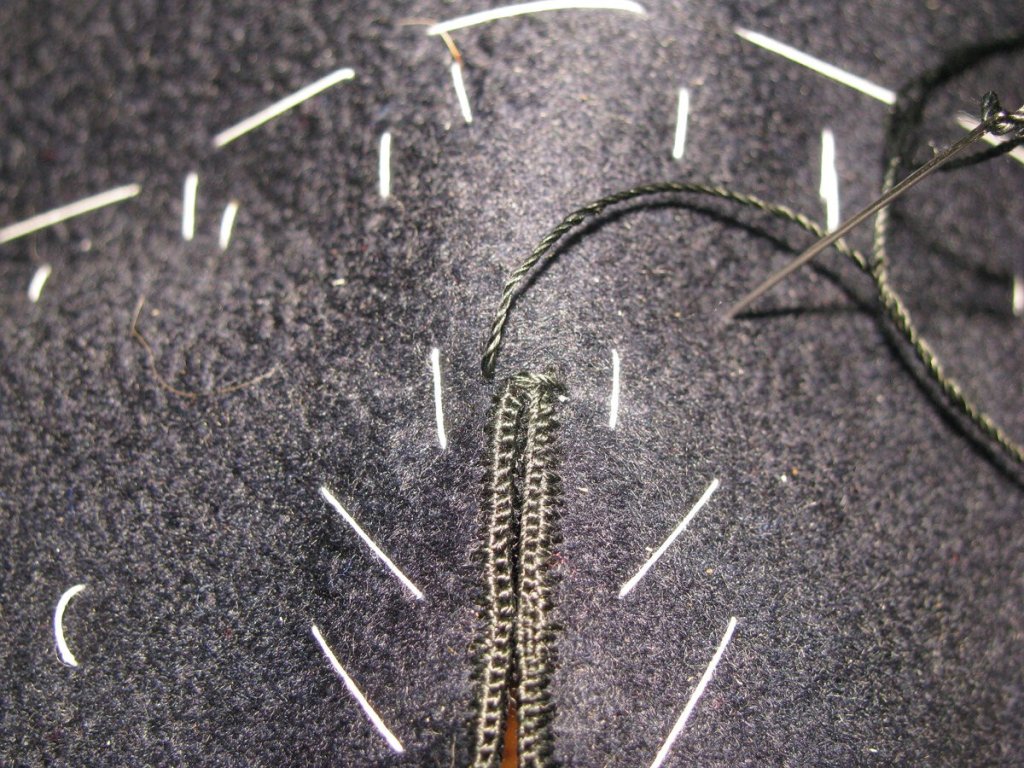
In order to prevent the buttonhole from stretching out of shape, and to provide firmness to the buttonhole, a thick strand of special silk thread called gimp will need to be placed underneath the buttonhole stitches.
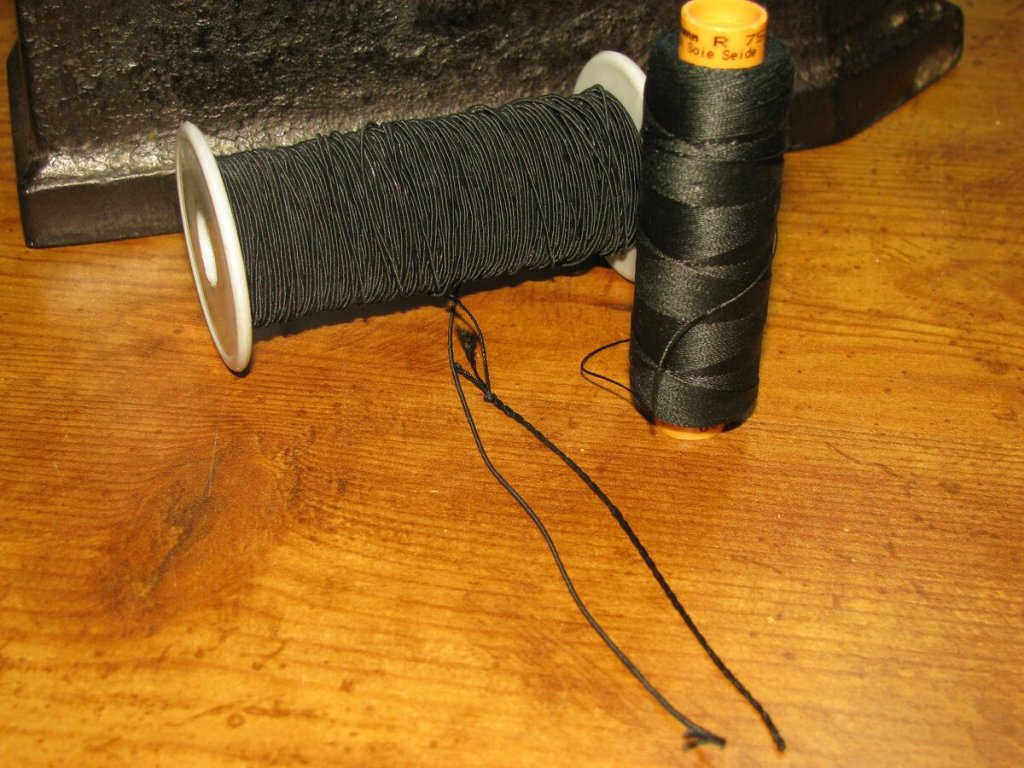
There are a couple of producers of this gimp out there still, but I use one in particular called Agreman gimp, which is made by Gutermann. As far as I know, it is only produced in Spain. It is made with filaments of silk, which are then bound by another layer of silk thread, making it very strong and stiff. Other gimps I have seen have contained or been made with polyester thread, so I have avoided them.
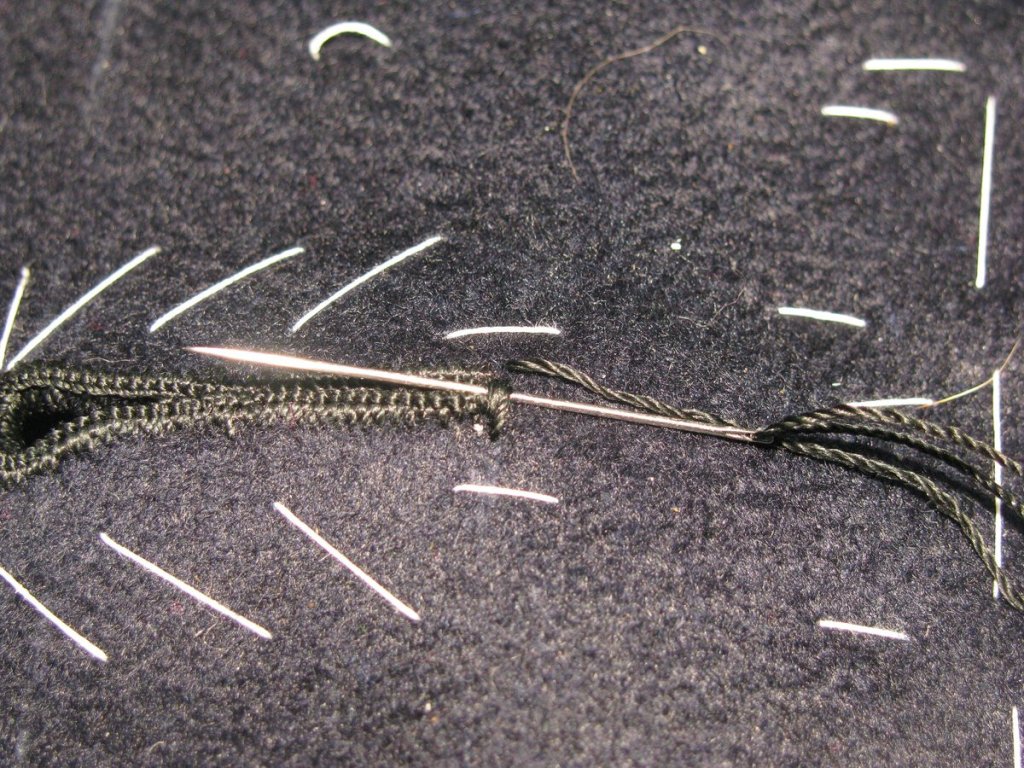
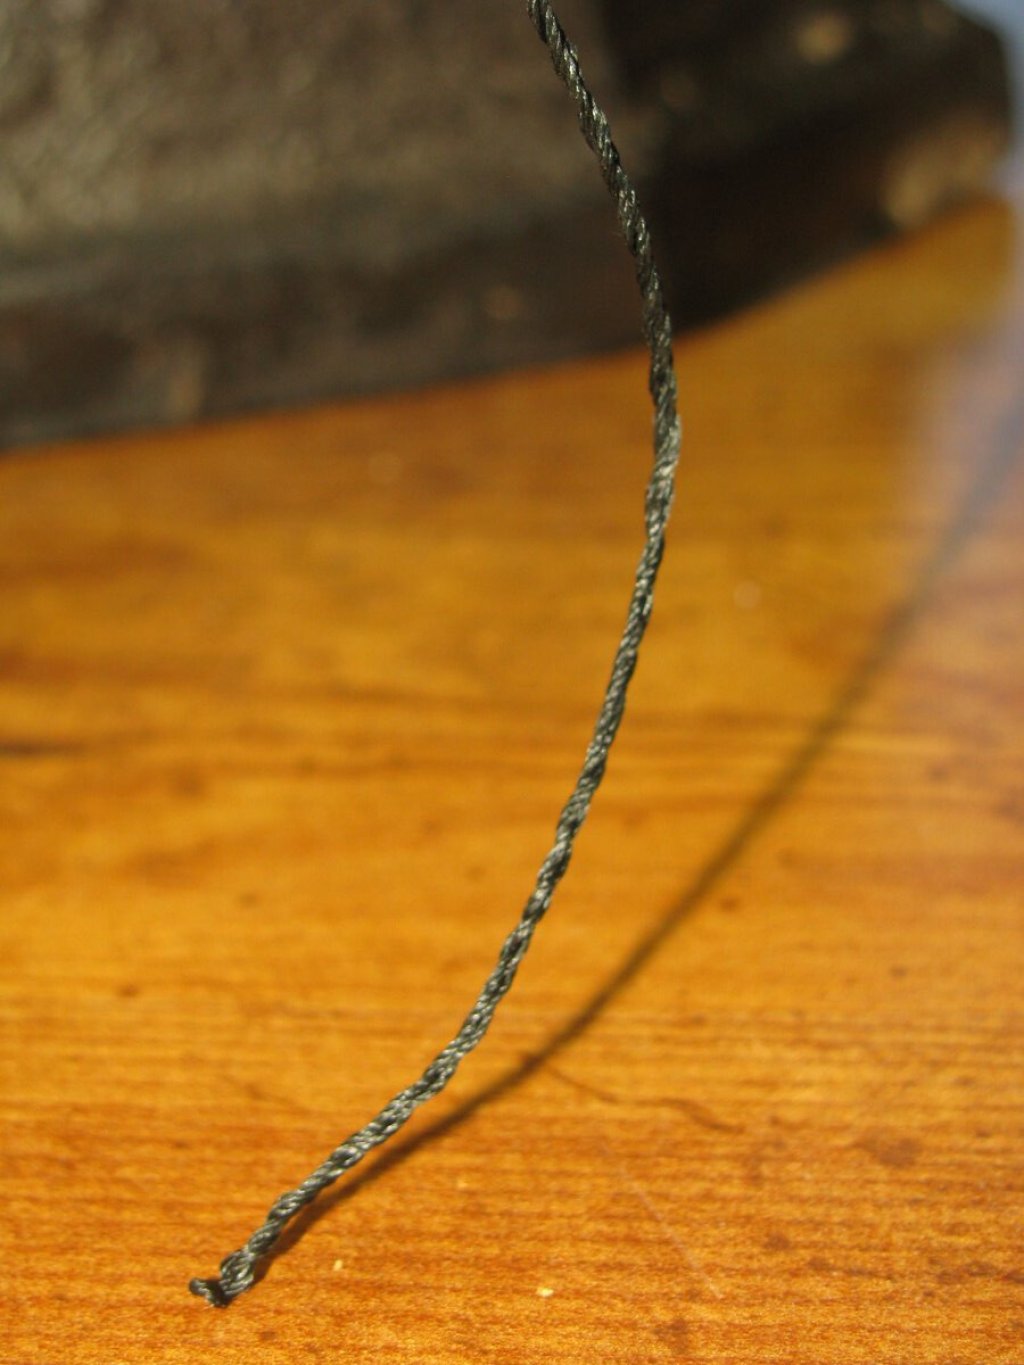
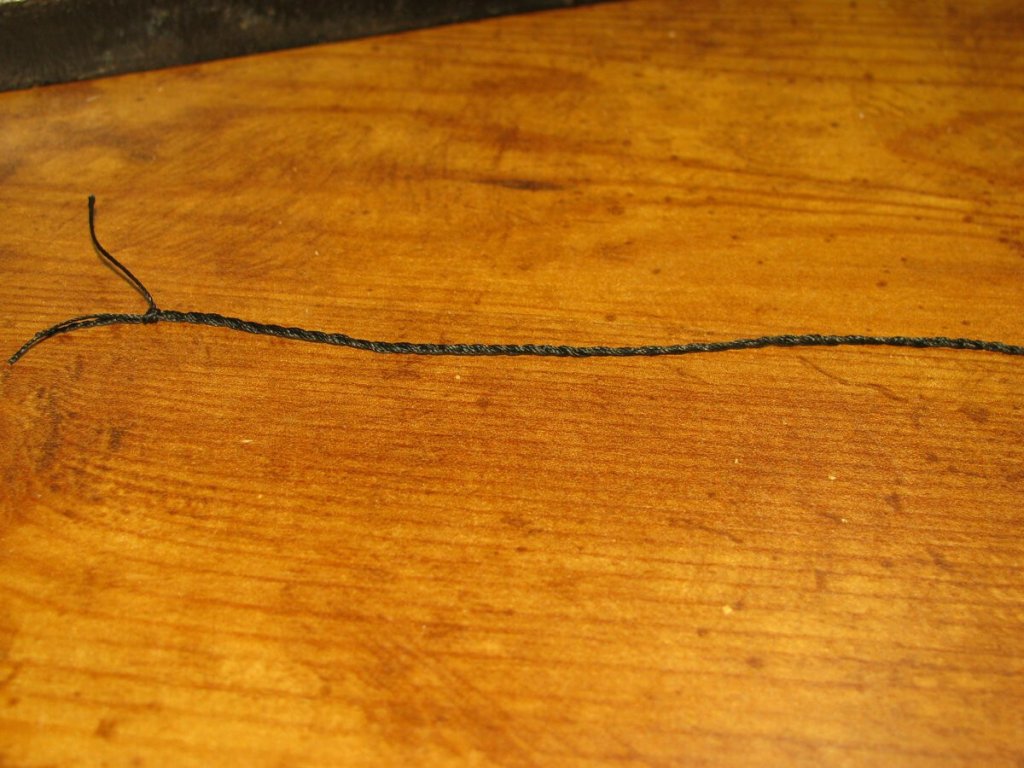
If you do not wish to use this type of gimp, it is possible to make your own, using a strand of silk buttonhole twist. Cut a length about 18 inches long, and double it. Secure the ends by weighing or tying them down. Begin twisting the thread around itself, stopping just before the point when it begins to form little tension knots.

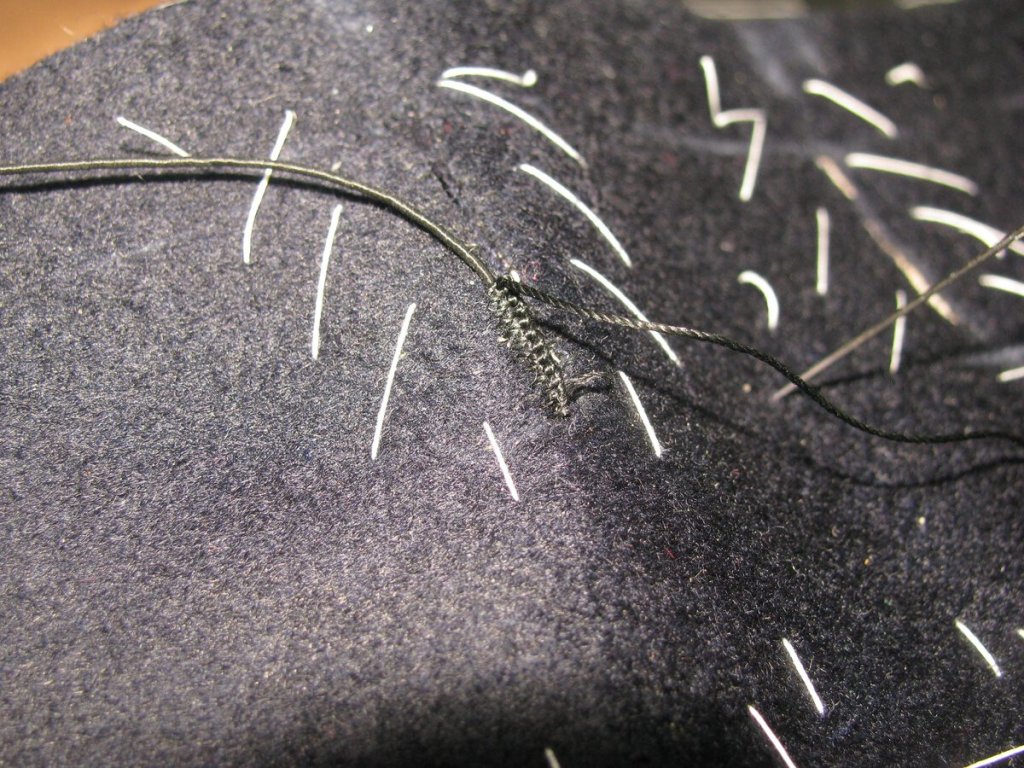
Take both ends in your hands, being careful to not let the ends untwist, and join them together. You’ll see both halves (really quarters) of the doubled thread begin to twist over each other. Help them along by smoothing the pieces together with your hands. When you are happy with the results, form a knot at the end where the cut ends are, securing the four-cord.
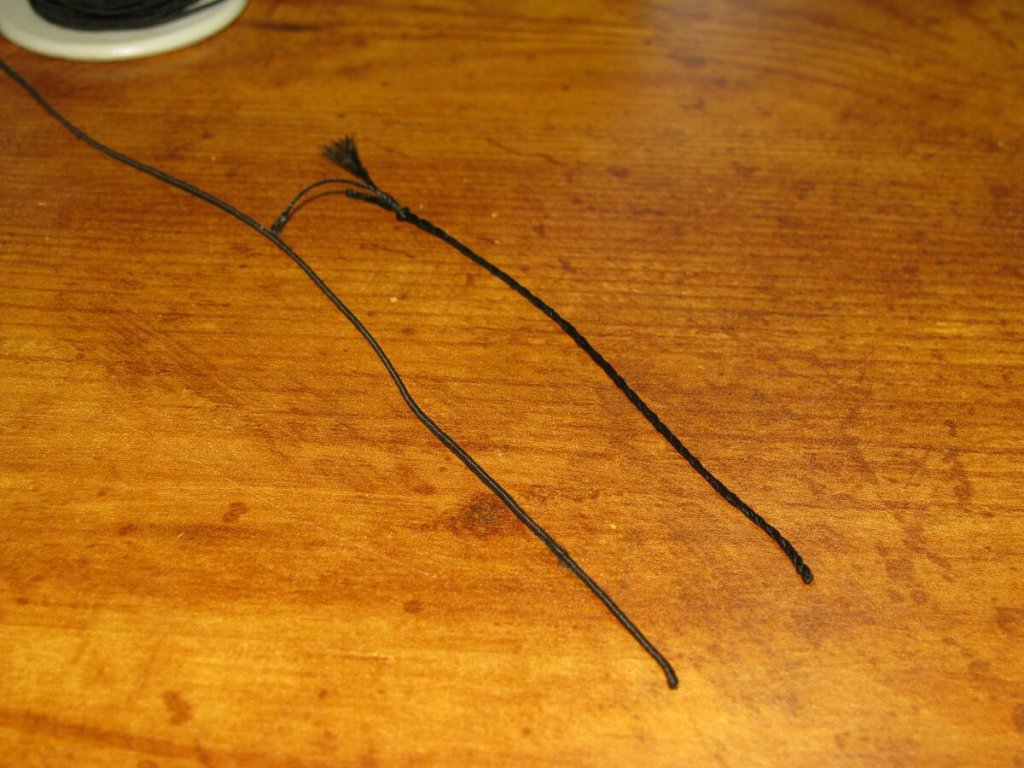
Now wax the four-cord by passing it over beeswax four or five times. Place it between a folded sheet of paper, and press, melting the wax into the threads. The four-cord is now complete. Repeat this process for each buttonhole. Here is the finished four-cord compared to the Agreman. Note how they are both fairly stiff.
Part II of my video tutorial covers making the four cord and overcasting the buttonholes.
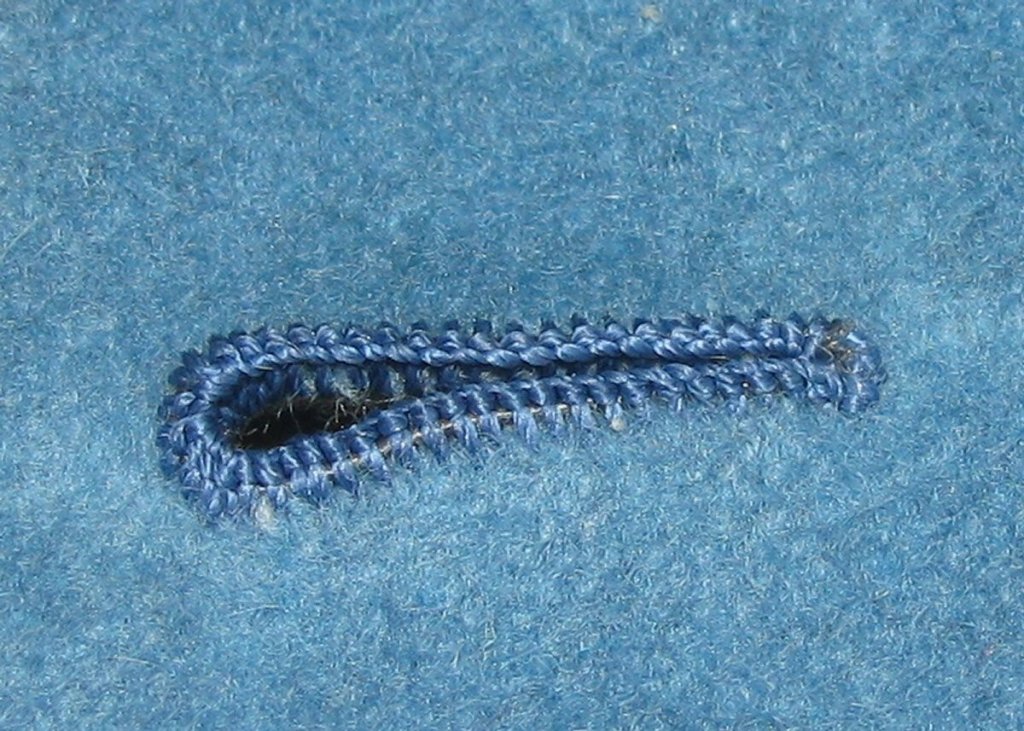
The Buttonhole Stitch
A proper buttonhole should be made with silk buttonhole twist. The twist is thicker than normal thread, and will aid in the formation of the purls. I’ve seen two sizes generally available. Size F is very thick, although that makes it easier to work with. Gutermann makes a thinner buttonhole twist which is closer to original buttonholes I have seen. Being thinner makes it harder to work with, however.
Cut a length about one yard long for a one inch buttonhole. Wax and press the thread, and knot one end. Holding the edge of the coat with the buttonholes away from you, insert the needle between the layers of wool, at the left bottom edge of the buttonhole. This will allow you to hide the knot inside. Poke the needle out 1/16 to 1/8 away from the edge, but do not take it out completely at this time. The length of the buttonhole stitch depends entirely on the fabric used. Each coat will be different, so you really need to experiment. If the thread is too close to the edge, it can pull out, especially on easily-frayed fabrics. If it is too far from the edge, you will see puckering and have a generally messy buttonhole.
With the needle still poking out of the wool, take the doubled threads that come from the eye of the needle, and pass them under the needle to the left, forming a loop. Then draw up the thread so that there is about a ¼ inch of slack in the stitch.
At this time, insert the buttonhole gimp between the threads, so that it lays on top of the fabric. If using four-cord, the knotted end should be placed away from you. Draw the stitch firm, moving the thread side to side to lock the stitches. The stitches need to be firm, but not tight. By forming the stitch in this manner, you create a double purl, rather than the single purl commonly done by home sewers. The benefit of this is a stronger stitch, and one that will stay in place longer, even if a stitch happens to break someday.
The purl should be placed either directly on top of the gimp, or slightly to the inner edge. The first method raised the stitches, giving a very firm buttonhole. The latter makes the buttonhole a bit softer, with a lower profile. Again, experiment and see which you like best.
Continue working each stitch in the same manner across the lower edge of the buttonhole, making sure they are spaced evenly both in depth and proximity. Each stitch needs to be taken over the gimp, holding it in place. The spacing between stitches should be close enough that the purls touch, but not so tight that they interfere with each other.